I have a confession to make.
Until yesterday, I was writing this entire website manually, in HTML and CSS.
I know, I know, why didn’t I just use Wordpress or something, like a normal human? I’d like to say that I chose HTML to progress as a programmer, or because I didn’t feel like a blogging platform gave me enough control. Both of those things are kind of true. The real reason, though, is that I was creating a static site, and just getting it done with HTML was the easy way.
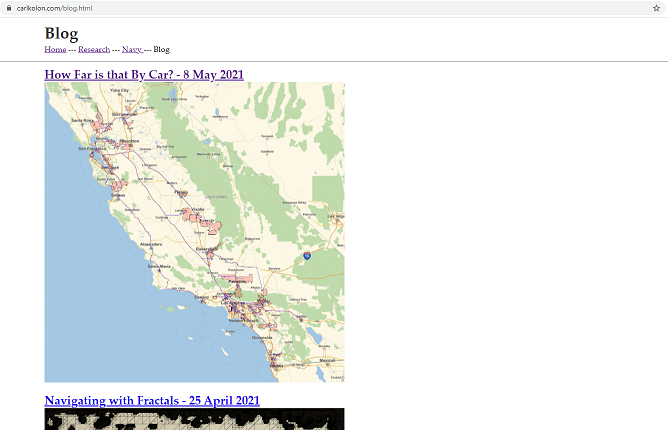
I realized that this wouldn’t work when I created my second article on this blog. How was I supposed to organize my posts? Would I have to update the blog main page every time I wanted to publish a new article? My main blog page looked ugly (see below), and maintaining it manually seemed like a nightmare that would only get worse as I publish more. Finally, I got over the peak of inertia and decided I would have to implement some new software.
I have used Wordpress in the past (although it was a while ago), but I was still hesitant to use it, or something similar. A whole new software and formatting setup would make it difficult to migrate my content over. Using semi-free commercial software is annoying, because you never know when a feature you need will be hidden behind a paywall. Plus, I didn’t want to screw around with finding a theme I liked. I want to control those things manually, so that if something irks me about my site, I can fix it (at least in theory).
So I went looking for new blog software. The following features were non-negotiable for me:
Additionally, the following features would be nice to have:
It was this quest for control (and, I’ll admit it, geek cred) which led me to Jekyll. Jekyll is a Ruby-based static website generator. I found it because many other options I was considering were based on Jekyll. I didn’t require anything really fancy, and Jekyll seemed to have everything I needed. I also have some experience in Ruby; it was actually my first programming language! I followed this tutorial when I was a kid.
So I started this by making my first mistake. I installed Ruby on my remote server.
Really, for most implementations, this wouldn’t be a mistake. If I were maintaining a blog run by multiple people it would actually be necessary. For me, though, it was unnecessary. I write all my posts from the same computer, and upload the files to the remote server using WinSCP. Running the Ruby code remotely (and using up storage space and capacity on the remote machine) wasn’t necessary and didn’t make things any easier, so why would I do it? Worst of all, trying to run Jekyll this way led me down a rabbit hole of nightmarish version control.
Jekyll requires Ruby version 2.5 or greater. Since Ruby is now on version 3.0, I didn’t think that would be an issue. My remote server runs Ubuntu 16.04, so I was expecting a very easy install. I ran the following:
$ sudo apt-get install ruby-fullI got all the normal messages, and then to check that the install worked, I ran:
$ ruby -v

ruby 2.3.0p0 (2015-12-25 revision 53290) [x86-64-linux]
Whoops. It turns out that apt had installed a version of Ruby that was too old (2.3). I didn’t really know why it did that. When I installed Ruby on a local VM running Ubuntu 20.04, version 2.7 installed. I had already run sudo apt-get update. It could have been because the Ubuntu version was fairly old, or maybe its repositories were out of date. I looked around online, but couldn’t find a smoking gun.
So, screw it. I uninstalled Ruby.
$ sudo apt-get remove ruby

$ sudo apt-get autoremove
And I reinstalled it with snap.
$ sudo snap install ruby --classic

$ ruby -v

ruby 3.0.0p0 (2020-12-25 revision 95aff21468) [x86_64-linux]
Perfect! Equipped with the new version of Ruby, I installed the rest of the dependencies and followed the quickstart guide to install Jekyll.
$ gem install jekyll bundler

...

ERROR:  Error installing jekyll:

(a bunch of tracebacks and error messages)

You have to install development tools first.

...
Again, I wasn’t able to duplicate this issue on my local VM running Ubuntu, even with the snap install of Ruby. My remote machine had all the prereqs (gcc, make, gem). I think that the problem was that some of the functionality in ruby-full was not included in the snap install of Ruby. Specifically, I needed the development tools included in ruby-full or ruby-dev. These packages aren’t available on snap, as far as I can tell.
So I uninstalled Ruby again and reinstalled it with RVM, which would let me choose the version and package I wanted. I installed RVM using apt, following this guide, and installed Ruby 3.0 with the development tools. Finally, the jekyll install worked.
Around this time, I read the rest of the tutorial and realized that this would all be a lot easier to do on my own machine, rather than remotely. So I closed the ssh session and started working on my own desktop, which runs Windows. I installed Ruby 3.0 and the devkit from RubyInstaller, and repeated the Jekyll installation. This time, it all worked flawlessly. Go figure.
Before I started taking advantage of Jekyll’s features, I just wanted to make my old site work again. I made a new directory for the site, called jekyll. Following the tutorial, I structured the folder like this.
* _data/
* _includes/
* _layouts/
* _posts/
* _sass/
* _site/
* assets/
    * css/
    * media/
* blog.html
* index.md
* navy.html
* research.html
I made index a markdown file so that I could play with the markdown implementation. The rest of the files I just copied over. For index, I rewrote the main page in markdown. I attached a front matter snippet with YAML which included some information about the page (its title and layout).
---

layout: default

title: Carl Kolon

---
Jekyll uses a templating language called Liquid to write pages. In Liquid, layout is a special variable which allows you to choose how a page is typeset. Since I referenced the default layout, I now needed to create a default.html template in _layouts. The template is really just the header of my old main page, with placeholder variables (in double curly brackets) which are filled in with the variables I assign above (don’t worry about the {% include navigation.html %} snippet, I’ll get to it).
<!doctype html>

<html>

 <head>

  <title>{{ page.title }}</title>

  <link rel="stylesheet" href="assets/css/styles.css">

 </head>

 <h1>{{ page.title }}</h1>

 <body>

  {% include navigation.html %}

  <hr>

  {{ content }}

 </body>

</html>
The content variable will essentially paste my markdown file, converted into HTML. This means that now I can write new pages with markdown easily, without editing any HTML code.
With the other HTML files, I just deleted the headers and footers and left only the content. I made a separate math.html layout which includes the MathJax script, so my math would render on my Research page, and a third post.html layout for a blog post.
I copied the contents of my CSS stylesheet into_sass/main.scss, and I made a new master sheet called assets/css/styles.css (this is useful once we get to syntax highlighting). For now, I just had my master sheet import my main stylesheet.
---

---

@import "main";
The blank front matter forces Jekyll to still process the file.
Finally, I loaded the page by running bundle exec jekyll serve in the command prompt. Then, I went to http://localhost:4000 and my site was there!
I had to fix a few things. The main image on my homepage wasn’t centered, and it’s not trivial to do that using markdown (except for just using HTML code inline, which kind of defeats the purpose). I made a CSS tag called .center-image and attached it in markdown using {: .center-image}. I ran a few more minor fixes, but overall, the site looked almost exactly how it looked before.
Now, I wanted to take advantage of some of Jekyll’s features to make the site better than before.
I wanted to dynamically generate a navigation bar, in case I want to add another webpage in the future. There’s a tutorial for doing exactly this on the Jekyll site. Liquid uses tags (enclosed in percent signs) to perform logical operations on templates, which is perfect for this application. In the _data folder, I put a YAML file called navigation.yml. The file is just a list of page names and URLs for the four main pages of the site.
- name: Home

  link: /

- name: Research

  link: /research.html

- name: Navy

  link: /navy.html

- name: Blog

  link: /blog.html
Then, in includes, I put navigation.html, which uses a for loop in Liquid to generate the navigation bar, and colors it based on which page is selected.
<nav>
   -
    {% for item in site.data.navigation %}
      <a href="{{ item.link }}" {% if page.url == item.link %}class="current"{% endif %}>{{ item.name }}</a> -
    {% endfor %}
</nav>
A for loop! In HTML! Incredible. I made a CSS class called current in _scss/main.scss which colors the current link green, and now {% include navigation.html %} gives the following result:
If you haven’t noticed, the syntax on this site is now highlighted, depending on language. Jekyll has native support for syntax highlighting through Rouge. All you have to do is download a stylesheet. Here’s a good list. I downloaded pastie.css and put it in assets/css. Then I added the following line to assets/css/styles.css:
@import "pastie.css";To highlight code, I use the opening and closing tags:
{% highlight lang %}

some code here

{% endhighlight %}
Replacing lang with the language the code is programmed in. Rouge has support for 205 languages, including all the major ones.
It was my desire to blog that forced me to do all this work in the first place. Jekyll is designed for blogging. You can write markdown or HTML files and save them (with a formatted title) in the _posts folder. For example, this post is called _posts/2021-07-31-websitejekyll.md. They are formatted the same way as normal Jekyll pages. Along with the normal layout and title variables in the front matter, I used a predefined tag called an excerpt separator. This lets me choose where the preview of my post ends. Jekyll can do this automatically, but I prefer to control it. I do this by adding the following code to the front matter:
excerpt_separator: <!--more-->Then, somewhere in the page, I can drop <!--more--> and the preview will end there.
To access all the blog posts, I made the main blog page, blog.html. This page is really a liquid script to display all the posts, with a YAML and an HTML section.
---
layout: default

title: Blog
---<h1>Latest Posts</h1>
{% for post in site.posts %}
<h2><a href="{{ post.url }}">{{ post.title }}</a></h2>
<h3>{{post.date | date_to_string}}</h3>
<p>{{ post.excerpt }}</p>
<br>
{% endfor %}Then I just write the posts in markdown and they automatically populate!
When I’m running bundle exec jekyll serve, the website is automatically compiled and hosted on my computer every time I make a change to one of the source files. The static webpages are saved in the _site folder. If I quit the process, I can manually compile the site with jekyll build. Once I’m happy with how the site looks locally, I copy the _site folder to the remote server, and now my site goes live!
Jekyll is really powerful, and once I got over the initial kinks of installation, it was easy to use as well. So far, it has been exactly what I’m looking for. Running it remotely is possible, but it’s unnecessary for me at this point.